
If you need any more information, check the WordPress Codex, or send a message to the TLTC.
WordPress Blogging
A Quick Start Guide
by the Teaching Learning & Technology Center
Congratulations, you are a proud new blog owner! Blogging is an exciting and effective way to communicate information in today’s wired society. Some of the most popular blogs on the web have more readership than big city newspapers and magazines.
This guide will help you get started with some of the basic features of our WordPress system. Going through the entire guide should take less than an hour. We will teach you to use the features most applicable to you as a member of an academic community. You will then be able to tackle some of the more advanced features on your own.
More information, including links, contact emails, can be found in the resource section at the end of the guide and also on the WordPress Codex.
Ready? Let’s get started!
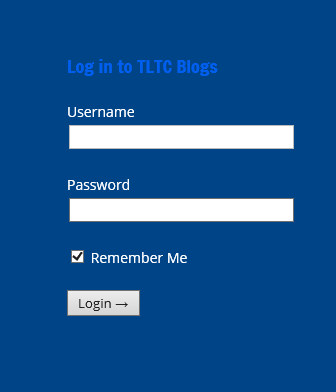
Logging In To Your Blog
The first thing you need to do is log in to your blog. Go to the homepage at http://blogs.shu.edu. In the footer you will find a login box. Enter in your PirateNet username and password to continue.
The WordPress Dashboard
The WordPress Dashboard is your navigation system. There are multiple buttons that you will take you to the different setting and configuration screens. Over time you will learn all of them and what they do. It may seem like a lot all at once, so we’ll go through the most important buttons one at a time.
The grey Quick Bar appears the top of any page when you are logged in.
![]()
The most commonly used features — adding a post or page, managing comments, editing the current page — are all available from here with a single click.
Selecting a Blog
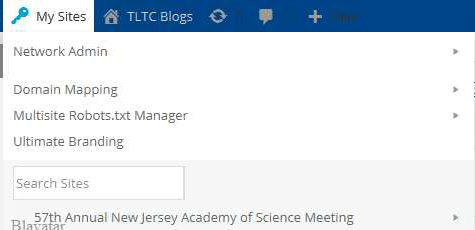
Some users may be members of multiple blogs. You may be added as an author of someone else’s or you may even have more than one of your own. If this is the case, you’ll first want to select which blog to work on. If you’re only a member of one blog, then you can skip this step.
- From the Dashboard, hover over the first link on the header – the “My Sites” link.
- Scroll down or search
- Pick the blog you wish, move your cursor over to the flyout menu and make a selection.
Making Your First Post
Now it’s time for you to create your first blog entry. WordPress creates a draft blog posting for you called, “Hello World”. We are going to make our own entry called, “Hello SHU!” which will be very similar, so you can check to see if you did everything correctly.
- Hover over “Add New” on the grey Quick Bar and pick “Post.”

- In the title field (under the Add New Post heading), type “Hello SHU!”
- In the body field, type: “Hello Seton Hall University! This is my very first blog entry.”
- Click the Save Draft button, then the Preview button on the box to the right. This will let you see what the entry looks like before you publish it. This is a good habit to get into before you publish anything because once you publish something, it is live for all the world to see. You can always save a draft of a post and come back later to finish it.
- After you’ve previewed and everything looks OK, click Publish. A yellow box should appear with a link to View post. Click that to view.
- Your entry should look like something like this:


Now go back, and use the left-hand menu, and click on “Posts” to go back to the Posts page.
Editing Your Posts
Often times you’ll want to go back and edit a post that you’ve already published, or continue to work on a draft. To do this, just go back to the “Posts” page (from the Dashboard sidebar, go to Posts::All Posts). Then hover on the title of the post you want to edit.

Editing and adding functionality is easy with WordPress. You can use all of the formatting you are used to using in Microsoft Word (lists, hyperlinks, bold, italic, blockquote, etc…). For more info on this refer to the WordPress Codex.
Adding Media to your blog
WordPress’ built-in functions make it simple to add images, sound and video to your posts. Adding media also enhances your content, breaking up the solid blocks of words and adding color to better illustrate your content, as well as engage your readers.
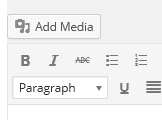
- Position your cursor in the point in your post where you want your media to appear. WordPress will automatically insert your new media where your cursor currently is, so make sure it is not in the middle of a word or a sentence.
- Click the Add Media button.
There are a couple of ways you can go from here. To add a media file you’ve already uploaded, just select it. Or, drag-and-drop files from your desktop right onto the window. Or, pick the “Upload Files” tab and click the “Select Files” button on the next screen.
- Next you’ll have the option to change the title, caption, description, alignment and size. Remember that the width of your blog post will typically be less than 500px. If you upload an image or video that is wider than this, it may not fit correctly. In this case you’ll want to click either “Medium” or “Thumbnail” size options and WordPress will resize it to fit into your theme. Try one of these options now so you can see the results. If you pick a smaller size, make sure that there’s a “Link To” selected.
- Click Insert into Post. Your new image will appear in the post body at the point your cursor was at.
- Remember to press Save Draft or Update after inserting your image to re-publish your changes.
If you ever need to edit any of these options, simply click the image and you can remove or edit it. For more info about this page and other image editing options, check out this link about using images in the WordPress Codex.
Adding any form of media is done in the same way. Just choose your image, movie, sound file or document.
Managing Your Comments
Blogging is social media, and all about discussion. One way to do this is through comments. People may view your posts and comment on your thoughts – some good, maybe some bad. This is why we need to be able to edit and filter what comes in.
- Go to the Comments button on the sidebar, or the balloon icon on the top bar. This will bring you to the Edit Comments page.
- Mouse over the comment and options will appear underneath them. Here is a detailed explanation of each:
- Unapprove – Removes a comment from the post, but leaves it in your pending queue. If you approve it again, it will reappear on your page.
- Reply – Adds a comment as a reply to the post.
- Quick Edit/Edit – Clean up misspellings or remove links.
- Spam – Sends the comment to the spam queue.
- Trash – Removes a comment entirely and deletes it from all queues.
When a new comment arrives, a large number in a circle will appear next to Comments in the left sidebar and at the top as a clue that you need to take a look.
Our WordPress system is equipped with two tools to stop spam. WP Zero Spam and Akismet. Zero Spam prevents bots from posting comments to your blog, and Akismet is a service that should capture all other spam comments before they get to you. If spam comments ever become a problem for you, please contact the TLTC.
Adding a Page
There may be situations where you will want to add a Page to your main blog. Pages are different from posts in that they will contain “evergreen” material. You might want to have a “Contact” page, a “Resources” section, an “About” page, or something to that effect.
Click on the Pages button on the sidebar, and you’ll see that WordPress has already made a generic About page for you, which you should edit. You can edit that with all of your own info. Adding more pages is the same procedure as creating a new blog entry.
Changing Your Theme
Don’t like how your page looks? Let’s learn how to change our theme.
- From the Dashboard sidebar, go to Appearance > Themes.
- You’ll see a list of all available themes. Hover over one, and you’ll have the option to do a live preview.
- When you’ve settled upon a theme you like, click Activate.
- View your page and you should see your new theme.
The live preview is only a starting point. Many themes require configurations and settings to make them look the way you want. All of them will at least require you to set up menus and header images. Don’t worry if you change themes and the new one just isn’t right for you — when you change back all your settings should be the same as where you left them.
Important Tips
Organize Your Content
It’s very helpful to your reader when your content is organized in categories. This might not seem like a big deal now, but a year from now when your blog is full of content, it will be easier for your readers to find exactly what subject matter interests them.
The two best ways to do this are through categories and tags. The two are similar in nature, and the differences between them are subtle. WordPress has an in-depth explanation at the WordPress Codex. Our favorite way of explaining it is this:
If your blog were a book, think of categories as your table of contents. Think of tags as the index.
Using Microsoft Word of Excel
Say you are preparing a blog post and you write up a draft in Microsoft Word. You go to copy and paste it into WordPress and all of a sudden your formatting is all over the place. What happened? Well, when you copy your content from a Word document and paste it into the WordPress interface, it doesn’t just add the text you selected. It also adds a large chunk of code that can mess up your blog’s formatting.
Normally, we frown upon using Word (and especially Excel) this way, as the best option is always to type your content into the WordPress editor directly. This is the only way to completely avoid any formatting issues.
But if you must use Word, make sure you turn on the ‘Paste from Word’ option. From the “Edit Post” page, follow these steps.
- Move your cursor to where you want your content to appear in your WordPress post.
- Activate the “Toolbar Toggle”.

- Pressing this button shows a second row of options for formatting your content.

- In the middle of this new row is the “Paste as Text” button. Click it and a new window will pop up for you to paste your Word content into. Press Insert and your content will appear where your cursor was positioned.
- Press Update / Publish to save your content.

If you have a table, there are a few good table plug-ins we have installed and you can use. Just ask, or follow the included directions.
Preview Your Posts and Save Often
As mentioned in the “Posting Your First Entry” section, it’s always a good idea to preview your posts before publishing them. Remember: once you publish your entry, it is on the internet for all the world to see. Never put anything you might question, and always check that your post is exactly the way you want it to look before you publish it. It is especially important to keep this in mind when you’ve added media to your post.
While you can always edit or take down a published post, you never know when Google will come through to index it.
We’ll continue to post tips and tricks on this blog in the future, so stay tuned!
Comments