
It might be tempting to try and build one on your own, but by using this plugin you get additional features like spam protection, and it spares you writing HTML code. For most purposes, what we’ll show here is going to work perfectly.
Start by giving it a name. This is going to be called “Contribute To Our Research.” The new form comes with some pre-supplied standard fields that you can use (or not), just like the earlier sample.
We want to keep Name and Email. And definitely the “Send” button. But we’ll get rid of everything else. Now let’s create some new fields, using the built-in tools.
<label> Your Name (required)
 [text* your-name] </label>

<label> Your Email (required)
 [email* your-email] </label>

[submit "Send"]
Contact Form 7
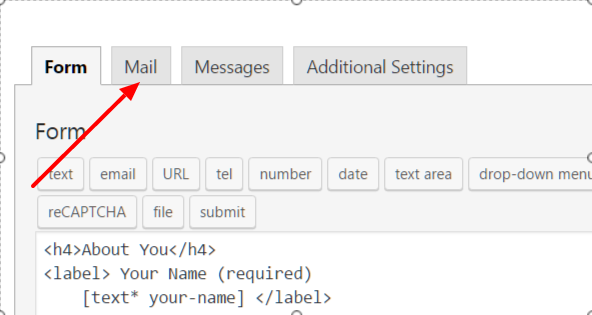
Start by going to your dashboard, and under “Plugins” find and activate Contact Form 7. You’ll see a new entry in your sidebar for “Contact.” When you hover over it, you’ll get choices for “Contact Forms” (which includes the built-in demo form), “Add New” and “Integration.” We won’t worry about that last one.
Once you’ve activated it, take a look at the included demo form in “Contact::Contact Forms.” You’ll see something named “Contact-Form-1,” and you should click on the edit link to see the code to the right:
<p>Your Name (required)<br />
 [text* your-name] </p>

<p>Your Email (required)<br />
 [email* your-email] </p>

<p>Subject<br />
 [text your-subject] </p>

<p>Your Message<br />
 [textarea your-message] </p>

<p>[submit "Send"]</p>
This seems complicated, and it is. However, the dashboard lets you build the code you need without actually have to type it in.
Make A New Form
Go to “Contact::Add New” and let’s start a new form. This will follow the creation of a form we are setting up on the Language Maps, Language Clouds blog here at blogs.shu.edu.
Start by giving it a name. This is going to be called “Contribute To Our Research.” The new form comes with some pre-supplied standard fields that you can use (or not), just like the earlier sample.
We want to keep Name and Email. And definitely the “Send” button. But we’ll get rid of everything else. Now let’s create some new fields, using the built-in tools.
<label> Your Name (required)
     [text* your-name] </label>

<label> Your Email (required)
     [email* your-email] </label>

[submit "Send"]
Cut To The Chase?
If this is all you need, just copy the shortcode that appears at the top of the form and paste it into a page or post and you’re done. See the section below on “OK Great I’ve Got My Form.” If you need more, read on…
Text Input
This is the simplest. Just pick the “Text” button, give the field a name. The other settings are optional. If you decide later to make a field mandatory, just put an asterisk next to “text” in the generated code.
What do the email (and other) buttons do?
If you pick Email, URL, tel or number, it sets the system to do validation to make sure that the user actually enters a proper Email address, URL, telephone or number. An error is displayed if not. The Date button creates a calendar-style date picker, which can be very helpful if you’re collating your responses later.
Dropdown Menu
For example if you want to create a dropdown, here’s how you do it.
First, make a space in your page for it. Following the style that the rest of the form is using, that would just be an empty paragraph:
<p>
</p>
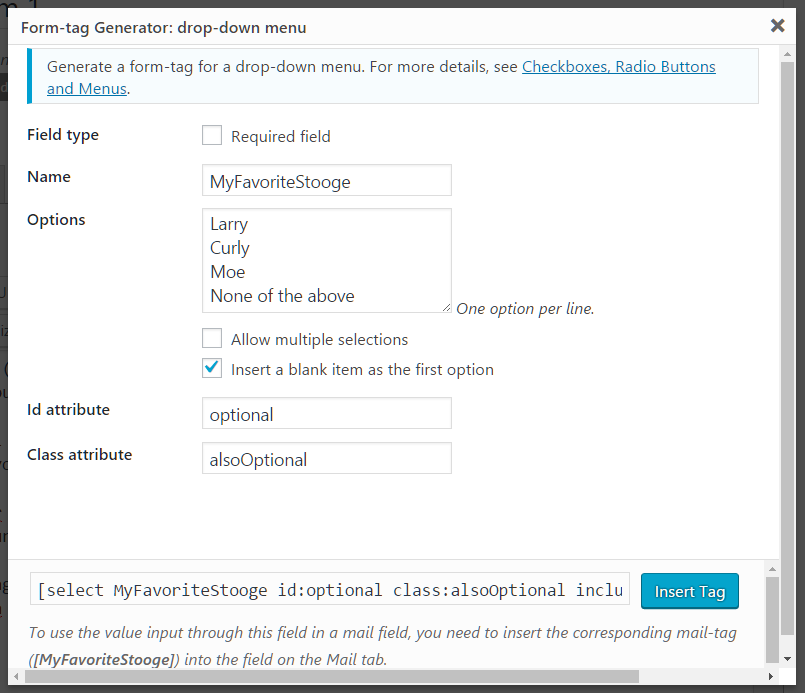
Plant your cursor right after the opening tag, then click the button for “Drop-Down Menu.” You’ll get a popup window where you can build out the details of your dropdown menu.
As you build the form, the shortcode is also being built in the box near the bottom. Once you’ve got everything the way you want it, click the Insert Tag button. We’re going to use a list of languages. And we’ll have text entry box underneath, for the level of understanding you have of it. Note that I’ve made these required fields, since everyone should have at least one language.
<label> Your Name (required)
 [text* your-name] </label>

<label> Your Email (required)
 [email* your-email] </label>

<label> Village/Town/City of Residence
 [text your-residence] </label>

<label> Village/Town/City of Where You Grew Up
 [text your-origin] </label>

<label> Languages you speak, read, write,
  understand or recognize
 [select* language-1 id:language1 include_blank
     "English" "Spanish" "Italian" "French"
     "Tagalog/Filipino" "Portuguese"
     "Russian" "Chinese"] </label>

<label> What level of understanding do you have
    for this language?
 [textarea* language1-ex 40x3 id:language1-ex]
</label>

[submit "Send"]
(additional lines are added throughout for clarity)
Note: using “<label>” instead of “<p>” is the newer way to do forms. It’s not mandatory, though. But be sure to include to closing tag.
<label> A language you speak, read, write, understand or recognize
 [select* language-1 id:language1
     include_blank "English" "Spanish" "Italian" "French"
     "Tagalog/Filipino" "Portuguese" "Russian" "Chinese"]
</label>

<label> What level of understanding do you have for this language?
 [textarea* language1-ex 40x3 id:language1-ex] </label>

<label> Another language you speak, read, write, understand or recognize
 [select* language-2 id:language2
 include_blank "English" "Spanish" "Italian" "French" "Tagalog/Filipino"
 "Portuguese" "Russian" "Chinese"] </label>
<label> What level of understanding do you have for this language?
 [textarea* language2-ex 40x3 id:language2-ex] </label>
Other Kinds of Input
Putting Your Form Into Action
After you save your form (you did save your form, didn’t you?) you’ll get another shortcode at the top of the screen. It’ll look something like this:
[ contact-form-7 id="25" title="Contact form 1" ]
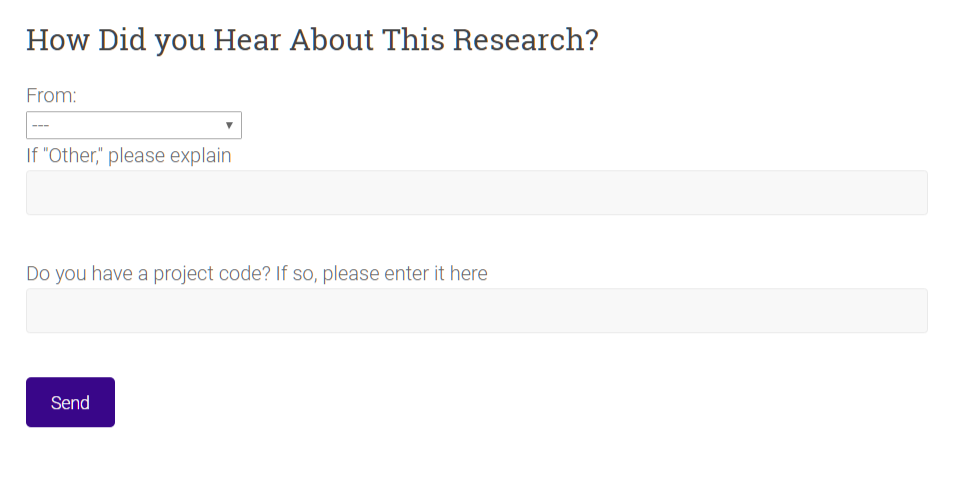
Create a new page or post, and paste it in. Be sure you’re in the text view! Then, preview your page/post and you should see your form:
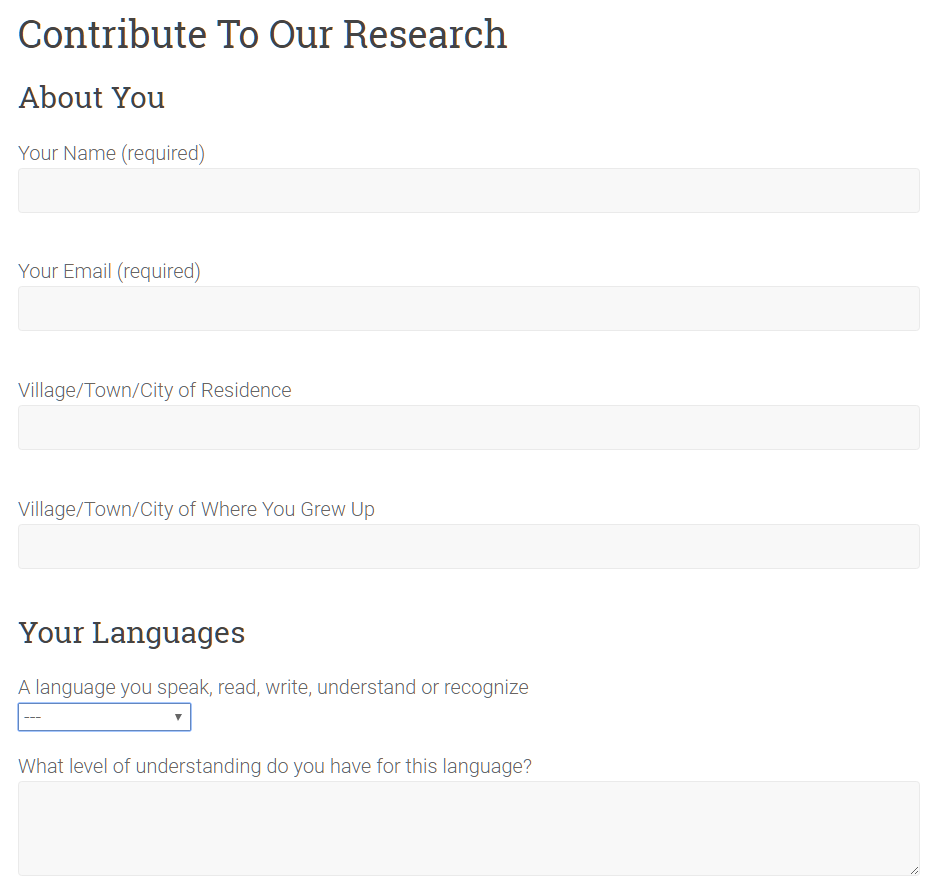
and further down…
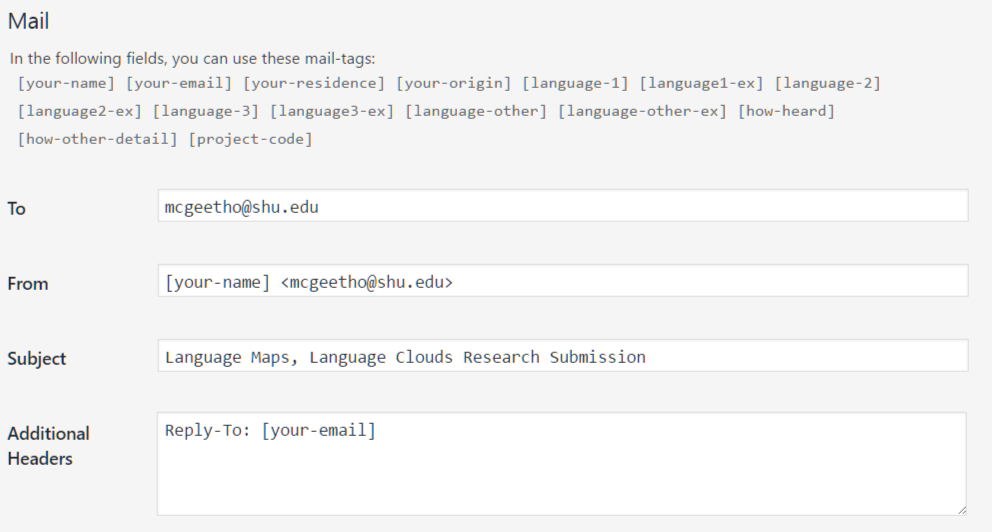
OK Great, I’ve Got My Form. Now What Happens To The Entries?
From the “Mail” tab, you’ll essentially construct an email message. You’ll see fields for the recipient, sender, subject line, and message body. You can send HTML email, and even include attachments. It even shows you the fields you’ve set up in the form — and you can double-click then drag and drop them into the body or headers of your message. They’ll appear in square brackets, and you can surround them with your own text so that the email message is clear. Right-bottom, here’s how you might set up your headers:
Angle Brackets
Respondent
Name: [your-name]
Respondent: [your-email]
Residence: [your-residence]
Place Of Origin: [your-origin]

Languages
First Language: [language-1]
First Language Proficiency:
   [language1-ex]
Second Language (if applicable):
   [language-2]
Second Language Proficiency:
   [language2-ex]
Third Language (if applicable):
   [language-3]
Third Language Proficiency:
   [language3-ex]

Other Language (if applicable):
   [language-other]
Other Language Proficiency:
   [language-other-ex]

Source: [how-heard]
Other Source (if applicable):
   [how-other-detail]

Project Code: [project-code]
Or code them in HTML, after checking the appropriate box. You can create a second email if you want, for use as a receipt to the original sender, for example.
Be sure to save your work!
Test It Out
You have to test it out, seriously. It’s amazing how many details can slip through, even if you’ve done it before. If you do have changes, you can just go back into the form edit screen, make your changes and save it.
I’m going to test my form right now. I’ll navigate to the new page I created (where I pasted in the form shortcode), and fill it out. Wait right there…
…OK, I’m back. It all came through fine with one exception — a missing linebreak. Here is the message I received:
Respondent
Name: Tom McGee
Respondent: my.email@gmail.com
Residence: South Orange, NJ
Place Of Origin: Cleveland, Ohio

Languages
First Language: English
First Language Proficiency: Native Speaker
      Second Language (if applicable): Spanish
      Second Language Proficiency: Took Spanish 1
Third Language (if applicable):
Third Language Proficiency:

Other Language (if applicable): German
Other Language Proficiency:
   Enough, genug, whatever
Source: Professor or Teacher
Other Source (if applicable):

Project Code: n/a
As you can see, the “Second Language” block got smushed in. I’m not exactly sure, but I’ll go back into the “Mail” tab and correct it.
Securing Your Form
Spam is a constant problem, anywhere on the web where you’re asking for user input. Bots, Russian hackers, script kiddies and the like are constantly spreading their good word of cheap pharmaceuticals — using your web site as their billboard. And those are the good cases. In the bad cases, they try to inject code that will compromise your entire server.
And almost all of it is automated. The amount of time it would take to individually comment on blog posts or fill in forms by hand would be prohibitive to their business model, which is to blast as many sites as possible in the hopes that some of their message will get through.
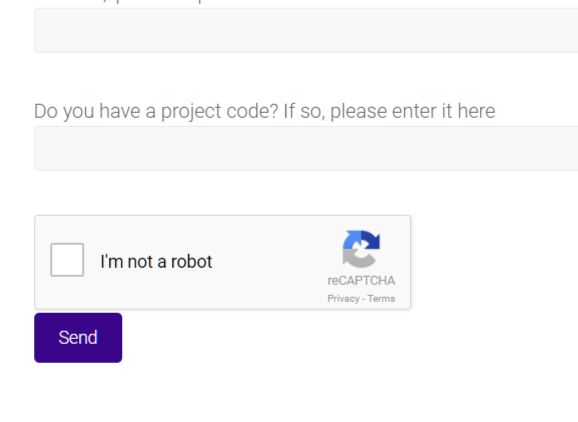
The point being, don’t try to do it manually; there are experts on the job. As the spam arms race continues, more devious tactics are used to plant spam; and more clever tactics are devised to fight it. We’ve got a couple of good anti-spam plugins already activated that prevent almost all comment spam, and quite a bit of form-reply spam. But you can make your form even safer by using CAPTCHA technology. You’ve seen it frequently — one of those blocks where you check off the box to prove you’re not a robot. Here’s how to incorporate it into your form.
Back in the form editor…
You can click on the “reCAPTCHA” button, and it will warn you that you need an API key. This is pretty easy to get, just walk through the instructions on the link given. You’ll get two keys, a “site key” and a “secret key.” Copy-and-paste these somewhere for safekeeping, and then find “Integration” under the “Contact” menu in the left-hand column of your dashboard. You’ll simply paste these two keys into the appropriate spaces, and save.
Then go back into your form, put your cursor right above the code for the submit button and click the “reCAPTCHA” button again. Set a few options, and enter it into your form.
[recaptcha]
Save your form. It’s as simple as that.
Of course, go back into the page where you’ve placed your form and test it out. You should see this:
Storing Your Responses
If you’re doing research, collecting registrations for an event, or many other kinds of uses, you’re going to get to the point where you want to see it all at once, preferably in a spreadsheet. For this you use the Contact Form 7 DB plugin. Activate it, and immediately your form responses are stored. From there, you can export them as text or CSV files that you can open into Excel. In the near future you’ll also be able to expert Excel or Open Office format spreadsheets.
You can also set up pages to display your data publicly, using the shortcode sets that are provided. Just look at the Contact Form DB Shortcode screen, set your options, and copy-and-paste the shortcode into a page.
In Conclusion
That’s a lot. But remember, the basic contact form is set up already for you, all you’ve got to do is make sure that the right email address is set to receive the message. The rest? Just an added bonus. Thanks for reading!
Comments