Even if you’re running a private blog, your file attachments aren’t as secure as you might like. Your or your users can innocently copy-and-paste a link to a PDF file into an e-mail … which gets passed around … then somebody puts it in a Twitter or Facebook post … and before you know it the file you wanted to keep just for your selected audience has been indexed by Google!
Without getting too technical, that’s because links to file resources don’t necessarily go through the WordPress system to be screened. And usually that’s a good idea, and it happens all the time — for example with the images that are embedded in your pages. A browser’s request for a .jpg file goes right to and from the server without the overhead that content-management software imposes.
But for material of a sensitive nature that’s not enough, so we’ve made available a plugin that creates special links that are forced through the WordPress system, and can be made available only to your selected group of users.
The basic steps are
- Activate and set up the Download Monitor plugin
- Open the page or post where you want the link
- Create a new Download
- Insert it into the page or post
- Save your work
The detailed instructions follow…
Download Monitor
Go to your plugins page, then find and activate the Download Monitor plugin.
Once you’ve done that you’ll find a new area in the left column called “Downloads.” You should do a few basic configurations first, so hover over “Downloads” and choose “Settings.” 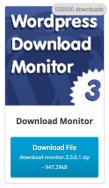 In the “General” tab, you’ll probably want to look at the Default Template. You can show the download count, or not; have the link as a button, or a box, or just the title as a link. Some of the displays can go a little overboard (as on the left), so preview your page before you publish. This setting can be overridden for specific items.
Save your changes, then look at the Endpoint tab. The “Download Endpoint” and “Endpoint Value” have to do with how the URL that goes onto the page will be constructed. If you want them to be less guessable, change them from the default values. Setting Endpoint Value to “Download Slug” is probably a good idea, but test it. If it doesn’t work use “Download ID” instead. And consider enabling “Prevent hotlinking”: In future server updates it might be possible to make it so that users can only get to your file by actually clicking on the link on your page — not via an e-mail link or a link on another site.
In short, just seven or eight clicks:
- Activate
- Settings
- Default Template (to Title Only)
- Endpoing (Endpoint value to “Download slug”)
- (optional) Prevent Hotlinking
- Save
Optional, FYI: The “Logging” tab is set up with defaults that are good for now. If you know what you’re doing, you can add Blacklist IP addresses or blocks, or other user agents which might be spiders or spambots. You can always keep an eye on the Logs themselves to see what’s going on.
Optional: Once you’ve got those basics set up, you can create sets of tags and categories for your file uploads, just like you would for a post. It’s a way of keeping things organized for your own benefit, and not mandatory.
Create a New Download
Go to the Downloads menu in the left column, and click “Add New.” You’ll see a screen that looks a lot like a standard new post screen. Give your download a title (this is what users will see as the underlined link when you include it on a post or page), and a description if you want. Don’t worry about the “Add Media” button right now, that’s only if you want to display your links with images and text.
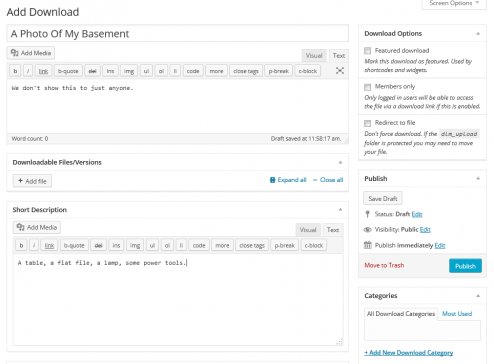
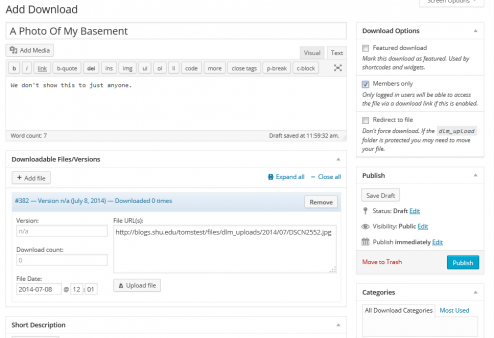
Now, the part where you lock it down. In the Download Options box on the right, select the “Members only” checkbox. This will make it so that only people who are listed as users on your blog can access the downloadable files. Then, under “Downloadable Files/Versions” click the +Add file button.
You can keep track of versions here, which is appropriate if your file is a piece of software, or a users’ manual of some kind. Click the “Upload file” button and find your file using the usual WordPress drag-and-drop, media or upload methods. Then click the blue Insert File URL button. You’ll see this:
In Short:
- Create a download
- Give it a title
- Upload a file
- Check “Members Only”
- Publish
You can also password-protect downloads, to add another layer of security.
Warning! Danger!
The File URL that you see? It isn’t protected at all. It’s there for your information only, and if you hand it out to anyone then all bets are off. Don’t use it.
Finishing Up
Just as you would with any other post or page, click the Publish button, and your Download is ready for use.
Using Your Downloads
In Short:
- Position your cursor
- Click “Insert Download”
- Check off the download you want to insert
- Click the blue Insert button
Go into any post or page where you want the link to appear. I’ll call this page “Protected Content,” but yours can be named whatever you want.
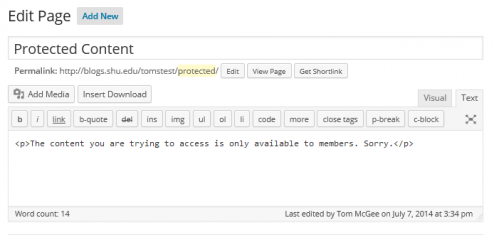
You’ll see a new button right next to Add Media — “Insert Download.” Click it, and a selection of your available downloads is displayed.
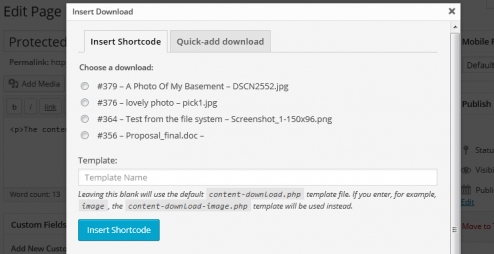
Check off the download you want to include, and click the Insert Shortcode button. (The “Quick-add download” tab can be useful, but if you want to restrict your file to site members, or do any other special configurations, you’ll need to go into the “All Downloads” section and modify it later on.)
Now your page code looks like this:
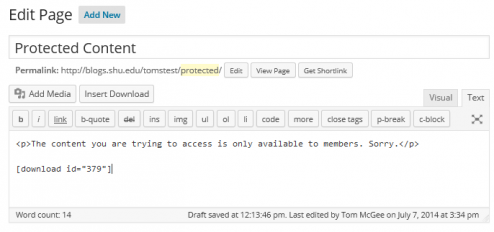
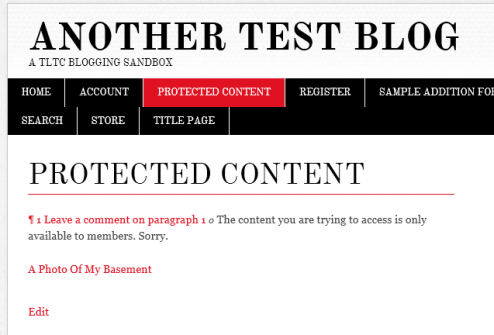
And when you preview it, it looks like this:
How It Works
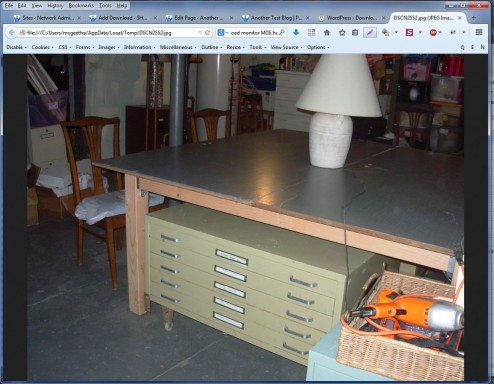
The link under “A Photo Of My Basement” is actually http://blogs.shu.edu/tomstest/download/a-photo-of-my-basement/, and that’s a link you can freely share with people in your group (unless hotlink protection is turned on). I’m a logged-in user, so I can click on it and get:
However, if I’m not logged in:
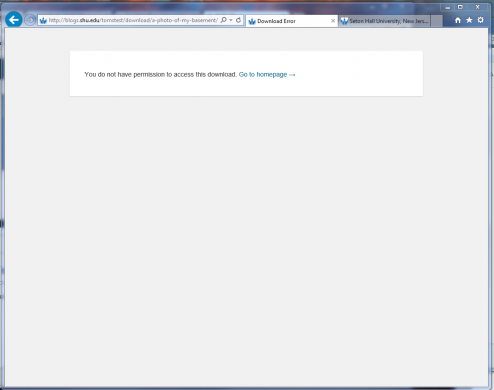
Which is exactly what we want. Out-of-the-box, this plugin would allow any logged in user who is a member of any blog on the system see these links, but we’ve modified it so that they have to be a member of the specific blog where the link resides.
Retrofitting Your Site
If you’ve got material already up that you want to limit, you’ll need to go through a few extra steps.
- Get the file you want to protect; you may have the original, or you may need to download it.
- Make a note of everywhere you’ve linked to it.
- Delete the file from the web server.
- Re-publish it through the “Create A New Download” method outlined above.
- Update any other links to that file.
While you can re-use an existing file in your media library, for privacy that won’t do; the original links will still work.
Also go through your media library to see what else is there. A lot of times you’ll have draft or duplicate versions of files. It’s a good idea to remove anything that’s not being used.
Levels of Security
Depending on what you need, there are some progressive layers you can use to protect your blog from unwelcome guests.
Lowest Security
An open blog, with no password protection. Which is fine for most cases!
Private! Access Control Manager
Activate this plugin, make a few configuration changes, and your whole blog is inaccessible to non-members. Careful — make a few wrong changes and it’s inaccessible to you, too.
Once you’ve gotten started, though, the control over what people can see is pretty finely grained, including time permissions, allowing access to the home page, specific pages or categories, by user role, and so on.
Password Protecting Posts
Any individual post can be password-protected. Links to it will show up, but users will be prompted before they can read it. You can also make a post private, so that only you will be able to see it. Both of these are set in the Publish box at the top right, under Visibility.
Password Protecting Downloads
As explained above, the Download Monitor plugin lets you protect individual media files.
With all of these password methods, they operate separately from the login credentials. You might set a password like pA$$wuhrd! for all the pages you want to protect, just so it’s easy to remember. Bear in mind this kind of protection is little more than a speed bump to a dedicated hacker. But if you have a private site, with a password-protected page, with a password-protected media download, that’s three layers of protection.
Very Secure: File-Level Password Protection
Acrobat, Office and other applications let you password-protect a file from within the app. Read the documentation for that application for details, but when you apply a password the file itself is encrypted; even if an unauthorized person does get hold of it, it can’t be opened or read without the password. This is very secure, but only as secure as the password you apply. “password” or “123456” aren’t much better than no password at all.
Most Secure: Don’t Put It On The Web
Though if something is really extraordinarily sensitive, consider not putting it up on a web server at all! Even if the web application itself is secure, the server itself isn’t under your control (usually), and malware or other kinds of attacks can let a determined hacker into just about any system. Even the Pentagon gets hacked.


Even though this is an older article, it still has very appropriate advice, The more things change I suppose. I’d love to see an updated version for 2021 security advice.