Entering the Metaverse

The Evolution of the Web

The evolution of the World Wide Web is divided into three stages: Web 1.0, Web 2.0, and Web 3.0. Prior to learning about this, I thought about the evolution of the web as a series of steady changes that, along with technological and programming innovation, led to new features being available for users. However, now it is clear to me that there were certain changes more significant than others which explain the division of its evolution in these three stages. Web 1.0 was characterized by personal web pages, mostly static in nature. Ads on web pages  were banned and, as a content delivery network (CDN), it allowed users to easily retrieve information. This stage approximately lasted between 1991 and 2004.

Web 2.0, also called the participative social web, refers to websites which highlight user generated content, usability, and interoperability for end users. Although the transition from Web 1.0 to Web 2.0 did not involve any technical modifications, the wain in which web pages were designed changed to allow for interpersonal interactions and collaboration. Web 2.0 was especially characterized by browser technologies. In Web 2.0, several online tools and platforms were made available for people to share information. These included blogs, tags, social networks, and social media.

Web 3.0 represents the evolution of web usage and interaction, emphasizing the transformation of the web into a database. It incorporates Distributed Ledger Technology (DLT), with blockchain being a notable example. Data in Web 3.0 is shared rather than owned, and it enables the creation of Smart Contracts tailored to individual needs. One key aspect of Web 3.0 is the Semantic Web, which aims to organize information more logically than current search engines like Google. This approach allows machines to understand and reason about information, moving beyond simple keyword matching.

Virtual Reality

Virtual reality (VR), along with augmented reality (AR) and mixed reality (MR), is a type of extended reality (XR) a term used to refer to all immersive technologies that merge the physical and digital worlds. Virtual reality allows its users to be immersed in simulated digital environments. The use of a VR headset is required for users to experience a 360-degree view of an artificial world designed to fool their brain into believing they are actually there. The potential applications of VR have led prominent business magnates in the technology sector, like Mark Zuckerberg, to envision a “Metaverse”.

The concept of the metaverse is not new, it was first used in 1992 by author Neal Stephenson in his sci-fi novel Snow Crash. It envisions a virtual realm where billions of people live, work, shop, and interact, all from the comfort of their home. Instead of traditional computer screens, users enter a 3D virtual world, which resembling real life but enhanced. Avatars are used to represent individuals, and they seamlessly transition between various experiences, carrying their identities and assets with them. However, it’s important to note that, despite the expectation, the metaverse is not yet a reality.

I created an Adobe Express presentation about the use of VR for education. I go over the applications of VR in the classroom and its benefits for students as well as some of the challenges that may be encountered in its implementation. Click the link below to check it out.

Virtual Reality For Education Presentation

Accessibility Concerns

One of the most relevant accessibility concerns that arises with virtual reality is the lack of consideration for some people with physical disabilities, who will not be able to use this technology. The main component of VR, and what makes it immersive, is a headset which delivers audiovisual content. Although people with hearing impairments may still be able to get an immersive experience through visuals, people with visual impairments will not be able to have an immersive experience at all. Also, many headsets available in the market are controlled by hand-held devices. People with absent or physically impaired limbs will not be able to use them. Another concern regarding accessibility is cost. The VR headsets currently available in the market are expensive, which increases the cost of  implementing this technology. Although it may be beneficial for different purposes, the technology is so costly that only few individuals and institutions are willing to invest in VR.

ScreenPal Excel Tutorial

Bellow you are going to find an Excel tutorial that I made using ScreenPal (formerly Screencast-O-Matic). ScreenPal offers screen capture tools to create videos an images. Prior to this assignment, I have never used screen capture software other than the one that comes installed in my IOS devices by default. I found ScreenPal very useful when creating this tutorial since it allows you to record audio, capture content on screen, and record video from your webcam simultaneously. I decided to only record the screen of my pc and an audio narration. For this I used my Lenovo laptop and my Blue Snowball microphone. The tutorial itself is on how to edit a worksheet’s code in excel so that the width of the columns is automatically adjusted to fit the data inputted in them.

Objectives and Video Structure

With this video, I wanted to offer a solution to a problem that I believe is very common among all Excel users. I like Excel “hacks” or “tricks” because they provide solutions to problems that sometimes seem unsolvable, in addition, they facilitate or expedite tasks that may be time consuming. I had stumbled across a video on TikTok a long time ago which explained this same procedure. It was the first thing that came to mind when I saw that one of the options for this assignment was creating a video demonstration on how to perform a function in Excel. Although this is not precisely a function, it is a simple process in which, by inputting a code, a task that would otherwise be manual can be automated. This is one of those things that you didn’t know that you needed to know. I hope that everyone who watches my tutorial finds it helpful. I tried my best to be as clear as possible and uploaded it to YouTube not only to make it available for many more people, but also more accessible.

Structure

  • Introduction
    • What the tutorial will cover
  • Present the problem
    • Manual adjustment of column width
  • Present the Solution
    • Automatic adjustment of column width
  • Procedure
    • Right click worksheet’s name
    • Select “View Code”
    • Select “Worksheet” from the dropdown menu
    • Input code “Cells.EntireColumn.AutoFit”
    • Close Window
  • Result
    • Column with is automatically adjusted to fit the inputted data

Transcript

Hello everyone, this is a tutorial on how to make Excel automatically change the size of the cells so that they fit whatever you write in them. So, whenever you’re using Excel, you may notice that, if you write something like, let’s say, “sample text”…

If you write something that exceeds the size of the cell, it’s going to spill over to the next column. On the other hand, if you write something shorter, let’s say, a single letter, a lot of room is going to be left inside the cell. What I have found myself doing in this case and, I know most people do as well, it’s manually adjusting the width of the column so that the text fits.

This is very time consuming especially if you’re working with a lot of data. And also, what happens if the next cell of the column contains longer text? So, let’s write “sample text but longer”…

Now I have to adjust the width again to fit the largest text in the column.

Luckily there’s a way to automate all of this. What you want to do is right click on the Sheet’s name and select view code, this is going to take you to the Sheet’s code.

I’m going to select the drop down menu and click on worksheet. Now you’re going to input the following:

“Cells.EntireColumn.AutoFit”

Okay, once you have this, you can now close the window.

Excel should automatically adjust the width of the column to fit the text. So let’s write “sample text”…

As you can see, the width is adjusted automatically. Now let’s try with a single letter…

Again.

And let’s see what happens if the next cell contains a longer text…

So Excel is going to adjust the width of the column to whatever the longest text is.

On Creative Commons

What is Creative Commons?

Creative Commons (CC) is an international non-profit organization dedicated to developing and supporting the thriving commons of shared knowledge and culture. With this mission in mind, Creative Commons equips individuals and communities around the world with technical, legal, and policy solutions. The organization provides CC licenses and public domain tools which grant copyright permissions for creative and academic works, ensure proper attribution, and enable others to copy, distribute, and make use of those works. Creative Commons is actively working alongside major institutions to foster open licensing and its correct use. The organization runs a variety of programs including the CC Open Culture Program and the CC Open Education Program.

When something is created, its creator is entitled to copyright it. Copyright allows creators to specify restrictions as to what others can and cannot do with their creations. However, this means that creators, as the copyright holders, reserve the right to grant or decline permissions to anyone wishing to make use of their work. This process is inconvenient for both the creators and the users, mostly because of the time it consumes. Creative Commons facilitates the process by making permissions explicit and straight-forward. This allows the users to make use of creations responsibly, complying by the creators’ intentions, without having to ask for permissions.

The following video expands a bit more on how Creative Commons Licenses work:

How Will Creative Commons Impact My Search Strategies?

Although content labeled as free-to-use or copyright-free is widely available online, every piece of content has a creator. Copyright is something that I only used to worry about when I created projects containing images retrieved from the internet. I became very familiar with stock image libraries such as Pexels and Pixabay. Although I knew this images could be used for creative purposes under Creative Commons, I never took the time to inquire about the creators of the images I chose to use. I now understand that, despite being royalty-free images, their creators deserve proper attribution. And this is not limited to images, it goes for all the content that can be used under Creative Commons. I will definitely keep this in mind whenever I am developing a research strategy for a future project, not only in an academic context but also in a personal one. Furthermore, I will make sure to understand the creator’s intents and permissions in order to avoid any repercussions. This is something especially relevant whenever a profit is involved since some content is exclusively for creative use while other both creative and for commercial uses.

As To My Creations…

I like to think of myself as a very creative person. I like to produce photography, art, film, and music. Although I do not have any copyrighted creations, since I haven’t completed a work of which I’m proud enough, I’m certain that if I ever produce a high-quality creation without a profit in mind, I will consider sharing it under Creative Commons. However, I feel that it would make more sense if I shared a greater quantity of creations. Considering this, Photography may be the easiest way to contribute to Creative Commons. For now, I will think about it, but I am open to sharing my work in the future.

My Blog Finally Has a Banner!

How I Created My Blog’s Banner

Going into the creative process, I had no ideas as to how I wanted my banner to look. To draw some inspiration, I headed to Canva to browse through the platform’s header templates. Right away I found one that I liked. It was a simple template with very few elements, which would facilitate the changes that I was about to make. First, the color. I had forgotten that the theme I chose for my blog is primarily blue, so I immediately changed the color of the banner’s decorative shapes to match it. Then, I changed the title to “Thinking Out Loud”, the name of this blog, and added my name at the top for a personal touch. Then, at the bottom, I added the blog’s URL. Initially, I had planned to leave the title in black, but then decided to put the bottom line in blue for more contrast.

I added a picture of me to the side opposite to the title, but then realized that it wasn’t a good picture for the intended purpose. In fact, I couldn’t find any picture of me that was. I needed a picture of something that would represent the essence of this blog, which is seeking for answers through critical thinking and learning. I thought of uploading a picture of me with a thinking expression, but I decided to look at the stock images first. I found a cartoon man, that kind of looks like me, with the expression I was looking for and felt that it represented me the best, so I went with it. Then, I added a stock image of a thought bubble next to the man’s head, and then a stock image of lightbulb inside it.

At this point, I thought to leave it as it was, but the more I looked at it, the more I felt that something was missing. It was the background. It was entirely white, and therefore wasn’t contributing to the banner’s attractiveness, which according to the blog How To Make Your Blog Posts Stand Out With a Stunning Header Image, is essential since the readers first focus on the visual elements before reading the text. I began searching for a blog-related stock image to use as my banner’s background, to my surprise, I found out that Canva retrieves some of its stock images from external libraries. I stumbled upon an image of a computer, which I liked very much, and when I selected it, the image’s credits showed up. It was originally uploaded to Pexels, an online library with more than 3.2 million free stock photos and videos, by the user bongkarn thanyakij. After this change, my blog banner was finally complete!


First draft of the banner, which includes a picture of the author, an all-black title, and a completely white background.
Thinking Out Loud Banner First Draft


The Tools That Made This Possible

Canva

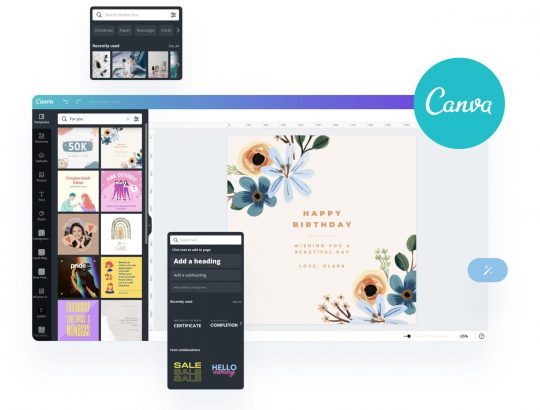
Canva is a free to use graphic design platform. This online tool allows its users to create social media posts, presentations, posters, videos, logos and more. I used Canva throughout the entire process of creating this blog’s banner. The platform is very intuitive and easy to use. As I mentioned in the previous section, I created my banner parting from a header template. Depending on the project you wish to work on, Canva has a vast selection of templates for every format and theme. Once a template is selected, the customization is pretty straight forward. It is worth mentioning that designs can also be created from scratch. All of the stock images that I used for the my banner were provided by Canva, although as mentioned earlier, it seems that Canva is connected to various stock image libraries from which it retrieves much of its content. In regards to the images, I made sure that they were free to use under Creative Commons Licensing, however, for elements such as shapes and text, this wasn’t necessary. Overall, I really enjoyed using Canva and found it to be a very complete platform to be based solely online. I will definitely use it in my upcoming projects.


Canva logo and sample Instagram post project in design tab next to several templates
Canva Sample Project


Spreading Awareness: Digital Accessibility

This week, I started module 2 of my Webpage Technologies course, which covers Digital Accessibility. Prior to the start of this module, I was unaware of the issues surrounding the lack of accommodations available for people with disabilities within digital spaces. Something that I learned and up to that point had failed to understand, is that the fact that I am able to easily navigate through online content does not mean that it is that way for everyone.

Introduction to Digital Accessibility

No matter the factors involved, digital spaces are meant to work for everyone. However, not all digital spaces are equally accessible; the way they are designed and coded determines how accessible they are. According to The World Wide Web Consortium’s (W3C) Web Accessibility Initiative (WAI), which provides a variety of technical and educational resources, web accessibility encompasses auditory, cognitive, neurological, physical, speech, and visual disabilities. Although many digital spaces have began efforts in an attempt to become more accessible, the truth is that most of these efforts are limited  either by the lack of knowledge of web developers and designers or by the investment that following accessibility guidelines poses in comparison to not doing so.

The range of accessibility that exists among different spaces the consequence of no guidelines being enforced. Although the ADA (Americans with Disabilities Act) requires web content to be accessible for state and local governments as well as for businesses open to the public, there’s no specific set of guidelines or level of accessibility to be met. In physical spaces, accessibility is enforced with specific measures, however, it is not the same for digital spaces, which makes finding a fully accessible website a true challenge.

Digital Accessibility Explained

Digital accessibility refers to making digital documents, websites, and apps accessible to everyone. The short video below explains in detail how the 57 million Americans with disabilities experience web content and the alternate methods they use to navigate it. It also covers the main characteristics of accessible websites and apps as well as the W3C’s Web Content Accessibility Guidelines (WCAG).

The Importance of Digital Accessibility

According to the World Health Organization (WHO), about 1.3 billion people or 16% of the world’s population self-identify as having a disability. This makes people with disabilities the largest minority group worldwide. Although the main purpose of digital accessibility is accommodating individuals within this group, we must also consider the benefits that digital accessibility has for people without disabilities. As human beings, we cannot escape from aging. As we get older, it becomes increasingly difficult for us to perform certain tasks as effectively as we used to. In our lives, we may also experience “temporary disabilities”  that impair us from performing tasks the way we regularly do. Overall, it is certain that, to some extent, we all benefit from digital accessibility.

Promoting a Culture of Inclusion

The best way to encourage the sense of social responsibility regarding accessibility to digital spaces is spreading awareness. I admire the work that the W3C is doing to make digital accessibility the norm. Although it requires good planning, designing, and coding to develop an accessible digital space, it all starts by becoming familiar with everything that digital accessibility encompasses and its importance. As the world becomes more technological and digitally-oriented, accessibility is a factor that we cannot leave aside. Accessibility should not be an after thought but an element to consider from the start in every project regarding digital spaces. I believe that learning about digital accessibility is essential for everyone since it can be applied in any context where digital resources are involved. This blog post is my way of spreading awareness about this topic which I consider to be of upmost importance. I hope you find this information useful and I encourage you to share it with others.