One Last Post… For Now

My Learning Journey

Over the past several weeks, I have dabbled in various topics and activities that required me to research and learn a whole lot. First of all, blogging. As you may be aware, I have shared this journey through this blog, which was created using WordPress. Therefore, my first challenge was learning how to use WordPress and all of its features. I must say, and this is something that I mention in my first post, that writing did not represent a difficult task to me since I feel comfortable expressing myself and sharing my opinions; what was difficult about content creation throughout this journey was the learning.

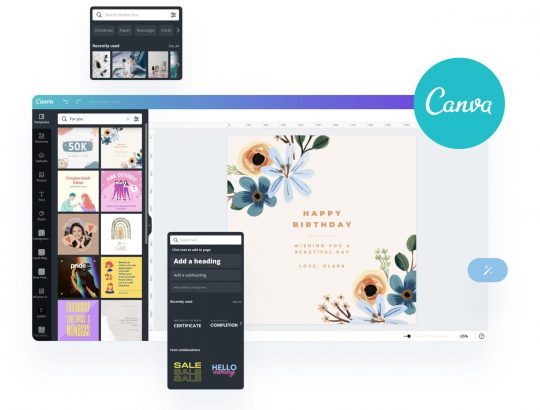
In my second post, I addressed digital accessibility and its importance. Prior to writing that post, I have never heard of digital accessibility. It required a lot of research for me to understand how digital accessibility can be achieved and how policy, specifically the ADA, supports its implementation. Following this post, I created another in which I talked about the process of creating my blog’s banner. This required me to learn how to use Canva. Although I already had experience using Canva, there were certain features, like the integrated image search, which I discovered in the process. My next post was about Creative Commons. Although I was aware of the existence of Creative Common licenses, I didn’t understand how they worked. Therefore, once again, research was required. For my fifth post, I created a video tutorial using ScreenPal. This is an Excel tutorial which explains how to automatically resize cells to fit the text inside them. Although ScreenPal proved to be intuitive and easy to use, the challenge here was researching the function I presented and getting the explanation right in the recording.

The following post, I believe, was one of the most difficult to create. In this post I covered HTML coding, which I tried learning many years ago but eventually forgot about. The thing was that, besides explaining HTML and its applications, I learned how to code a simple website to fully understand its workings. The next post was the one I enjoyed the most. It involved creating a podcast. I decided to talk about Ecuador, the country where I’m from, and its culture. Although I struggle with recording myself speaking, I had fun taking on the challenge and was surprised to discover that I like creating podcasts. The last post before this one was about virtual reality. This was another one that required research, but I think this research was the one that interest me the most out of all the posts I created.

Overall, I liked this learning journey. I discovered that I like some topics and activities more than others, but regardless of what the posts covered, each one taught me valuable information and skills that I may find useful at some point in the future. I believe that the more knowledge I acquire, the more prepared I will be for future challenges. As a person who likes creative activities, I am sure that online content creation is something I will continue to do. Although there are some formats that I enjoy more than writing, this blog will remainĀ  in my memory as the account of a great learning experience. I will definitely look back to it for inspiration and, who knows, maybe I’ll post again.


ScreenPal Excel Tutorial

Bellow you are going to find an Excel tutorial that I made using ScreenPal (formerly Screencast-O-Matic). ScreenPal offers screen capture tools to create videos an images. Prior to this assignment, I have never used screen capture software other than the one that comes installed in my IOS devices by default. I found ScreenPal very useful when creating this tutorial since it allows you to record audio, capture content on screen, and record video from your webcam simultaneously. I decided to only record the screen of my pc and an audio narration. For this I used my Lenovo laptop and my Blue Snowball microphone. The tutorial itself is on how to edit a worksheet’s code in excel so that the width of the columns is automatically adjusted to fit the data inputted in them.

Objectives and Video Structure

With this video, I wanted to offer a solution to a problem that I believe is very common among all Excel users. I like Excel “hacks” or “tricks” because they provide solutions to problems that sometimes seem unsolvable, in addition, they facilitate or expedite tasks that may be time consuming. I had stumbled across a video on TikTok a long time ago which explained this same procedure. It was the first thing that came to mind when I saw that one of the options for this assignment was creating a video demonstration on how to perform a function in Excel. Although this is not precisely a function, it is a simple process in which, by inputting a code, a task that would otherwise be manual can be automated. This is one of those things that you didn’t know that you needed to know. I hope that everyone who watches my tutorial finds it helpful. I tried my best to be as clear as possible and uploaded it to YouTube not only to make it available for many more people, but also more accessible.

Structure

  • Introduction
    • What the tutorial will cover
  • Present the problem
    • Manual adjustment of column width
  • Present the Solution
    • Automatic adjustment of column width
  • Procedure
    • Right click worksheet’s name
    • Select “View Code”
    • Select “Worksheet” from the dropdown menu
    • Input code “Cells.EntireColumn.AutoFit”
    • Close Window
  • Result
    • Column with is automatically adjusted to fit the inputted data

Transcript

Hello everyone, this is a tutorial on how to make Excel automatically change the size of the cells so that they fit whatever you write in them. So, whenever you’re using Excel, you may notice that, if you write something like, let’s say, “sample text”…

If you write something that exceeds the size of the cell, it’s going to spill over to the next column. On the other hand, if you write something shorter, let’s say, a single letter, a lot of room is going to be left inside the cell. What I have found myself doing in this case and, I know most people do as well, it’s manually adjusting the width of the column so that the text fits.

This is very time consuming especially if you’re working with a lot of data. And also, what happens if the next cell of the column contains longer text? So, let’s write “sample text but longer”…

Now I have to adjust the width again to fit the largest text in the column.

Luckily there’s a way to automate all of this. What you want to do is right click on the Sheet’s name and select view code, this is going to take you to the Sheet’s code.

I’m going to select the drop down menu and click on worksheet. Now you’re going to input the following:

“Cells.EntireColumn.AutoFit”

Okay, once you have this, you can now close the window.

Excel should automatically adjust the width of the column to fit the text. So let’s write “sample text”…

As you can see, the width is adjusted automatically. Now let’s try with a single letter…

Again.

And let’s see what happens if the next cell contains a longer text…

So Excel is going to adjust the width of the column to whatever the longest text is.

On Creative Commons

What is Creative Commons?

Creative Commons (CC) is an international non-profit organization dedicated to developing and supporting the thriving commons of shared knowledge and culture. With this mission in mind, Creative Commons equips individuals and communities around the world with technical, legal, and policy solutions. The organization provides CC licenses and public domain tools which grant copyright permissions for creative and academic works, ensure proper attribution, and enable others to copy, distribute, and make use of those works. Creative Commons is actively working alongside major institutions to foster open licensing and its correct use. The organization runs a variety of programs including the CC Open Culture Program and the CC Open Education Program.

When something is created, its creator is entitled to copyright it. Copyright allows creators to specify restrictions as to what others can and cannot do with their creations. However, this means that creators, as the copyright holders, reserve the right to grant or decline permissions to anyone wishing to make use of their work. This process is inconvenient for both the creators and the users, mostly because of the time it consumes. Creative Commons facilitates the process by making permissions explicit and straight-forward. This allows the users to make use of creations responsibly, complying by the creators’ intentions, without having to ask for permissions.

The following video expands a bit more on how Creative Commons Licenses work:

How Will Creative Commons Impact My Search Strategies?

Although content labeled as free-to-use or copyright-free is widely available online, every piece of content has a creator. Copyright is something that I only used to worry about when I created projects containing images retrieved from the internet. I became very familiar with stock image libraries such as Pexels andĀ Pixabay. Although I knew this images could be used for creative purposes under Creative Commons, I never took the time to inquire about the creators of the images I chose to use. I now understand that, despite being royalty-free images, their creators deserve proper attribution. And this is not limited to images, it goes for all the content that can be used under Creative Commons. I will definitely keep this in mind whenever I am developing a research strategy for a future project, not only in an academic context but also in a personal one. Furthermore, I will make sure to understand the creator’s intents and permissions in order to avoid any repercussions. This is something especially relevant whenever a profit is involved since some content is exclusively for creative use while other both creative and for commercial uses.

As To My Creations…

I like to think of myself as a very creative person. I like to produce photography, art, film, and music. Although I do not have any copyrighted creations, since I haven’t completed a work of which I’m proud enough, I’m certain that if I ever produce a high-quality creation without a profit in mind, I will consider sharing it under Creative Commons. However, I feel that it would make more sense if I shared a greater quantity of creations. Considering this, Photography may be the easiest way to contribute to Creative Commons. For now, I will think about it, but I am open to sharing my work in the future.

My Blog Finally Has a Banner!

How I Created My Blog’s Banner

Going into the creative process, I had no ideas as to how I wanted my banner to look. To draw some inspiration, I headed to Canva to browse through the platform’s header templates. Right away I found one that I liked. It was a simple template with very few elements, which would facilitate the changes that I was about to make. First, the color. I had forgotten that the theme I chose for my blog is primarily blue, so I immediately changed the color of the banner’s decorative shapes to match it. Then, I changed the title to “Thinking Out Loud”, the name of this blog, and added my name at the top for a personal touch. Then, at the bottom, I added the blog’s URL. Initially, I had planned to leave the title in black, but then decided to put the bottom line in blue for more contrast.

I added a picture of me to the side opposite to the title, but then realized that it wasn’t a good picture for the intended purpose. In fact, I couldn’t find any picture of me that was. I needed a picture of something that would represent the essence of this blog, which is seeking for answers through critical thinking and learning. I thought of uploading a picture of me with a thinking expression, but I decided to look at the stock images first. I found a cartoon man, that kind of looks like me, with the expression I was looking for and felt that it represented me the best, so I went with it. Then, I added a stock image of a thought bubble next to the man’s head, and then a stock image of lightbulb inside it.

At this point, I thought to leave it as it was, but the more I looked at it, the more I felt that something was missing. It was the background. It was entirely white, and therefore wasn’t contributing to the banner’s attractiveness, which according to the blog How To Make Your Blog Posts Stand Out With a Stunning Header Image, is essential since the readers first focus on the visual elements before reading the text. I began searching for a blog-related stock image to use as my banner’s background, to my surprise, I found out that Canva retrieves some of its stock images from external libraries. I stumbled upon an image of a computer, which I liked very much, and when I selected it, the image’s credits showed up. It was originally uploaded to Pexels, an online library with more than 3.2 million free stock photos and videos, by the user bongkarn thanyakij. After this change, my blog banner was finally complete!


First draft of the banner, which includes a picture of the author, an all-black title, and a completely white background.
Thinking Out Loud Banner First Draft


The Tools That Made This Possible

Canva

Canva is a free to use graphic design platform. This online tool allows its users to create social media posts, presentations, posters, videos, logos and more. I used Canva throughout the entire process of creating this blog’s banner. The platform is very intuitive and easy to use. As I mentioned in the previous section, I created my banner parting from a header template. Depending on the project you wish to work on, Canva has a vast selection of templates for every format and theme. Once a template is selected, the customization is pretty straight forward. It is worth mentioning that designs can also be created from scratch. All of the stock images that I used for the my banner were provided by Canva, although as mentioned earlier, it seems that Canva is connected to various stock image libraries from which it retrieves much of its content. In regards to the images, I made sure that they were free to use under Creative Commons Licensing, however, for elements such as shapes and text, this wasn’t necessary. Overall, I really enjoyed using Canva and found it to be a very complete platform to be based solely online. I will definitely use it in my upcoming projects.


Canva logo and sample Instagram post project in design tab next to several templates
Canva Sample Project